Tuesday, May 31, 2011

My husband is AMAZING!

Last Thursday, Don came home from work with a flat of absolutely beautiful strawberries.  We have a local stand, and their berries are delicious.  For the past couple of years, I've bought between 2 and 6 flats of strawberries, and made jam from them.  Last year, I didn't make any, because in 2009, I made about 100 jars, and we didn't need any.

This year, however, we have been running low.  And I've not made any moves to fix the situation.  So, Don bought strawberries.  I told him that I wasn't ready to do that this weekend, and his reply was....."I know.  I'm going to do it this year."  This made me pause.  When Don and I met, he was not exactly, um....fluent...in kitchen skills.  Being a bachelor, he didn't really have to be.  And while he has come a long way, I was not quite sure that he was up to jam.  Was I ever wrong!
See how beautiful?
Friday morning, I went to the grocery store to buy sugar and pectin.  Saturday morning, we bought more strawberries, more sugar, and more pectin, as well as canning jar lids.  Then the work began in earnest.
Sorting and washing strawberries.

Hulling berries.

Mashing the berries, a cup at a time.
One of three containers of puree.
Let me say right here that Don had minimal help from me.  I kind of advised from the sidelines with advice like "Technically, you're supposed to do this, but I do it a different way."  Without exception, Don chose to do it the way you are supposed to, which is actually better.  I like to take shortcuts.

Sugar, measured and ready for the pot.

Maddie, watching and "supervising".

Cooking the puree and pectin.

Maddie, making sure that Dad is stirring properly.
I am really quite impressed.  Not only did he make the jam, he cleaned up as he went along, a fairly unfamiliar process in my kitchen.  Which was good, as I had scrubbed the kitchen thoroughly the day before.
Lids, sitting at the ready in boiling water.

Adding sugar to the pot.
The boiling stage is over.

Filling the jars.


The first jar, ready for the hot water canner.
Truly, the biggest contribution I made to the day was finding empty jars in the garage.  And I didn't need to do that, Don could've found them easily.

At the end of the weekend, we had 40 jars of jam for the shelf, plus one in the refrigerator.  It is soooo yummy!  The kids had fresh strawberry jam sandwiches all weekend! 

Now that I know that Don can, and is willing to make jam, the sky's the limit!  I wonder if he realizes that I'm hoping to go cherry picking this weekend????

See you soon!


Bonus today: Bad Mom!

OK, Confession time.  It was brought to my attention that when I blogged about the Daisy Scout Investiture ceremony, I inadvertently left out one of the girls.  And, it was one of my girls.  And, I really, really, really thought I had included her.  But, I didn't.  So, without further adieu, here are pictures from Abby's investiture ceremony:
The Girl Scout Promise


Waiting for her Girl Scout pins.

Hoping Mom doesn't poke her with the pin!

A full-fledged Daisy!
I can't believe I did that.  I'm not sure what happened, but hopefully, I've made up for it now!

Daisy Scout Princess Party

On Monday, May 23, our troop attended a Daisy Princess Party, sponsored by a Cadet troop in our area.  The girls had a ball...talk about a tailor made event!  The troop that sponsored this has done so for about 7 years now.  This particular event was open only to Daisy troops.  There were around 70 kindergarten/1st grade age girls there!

The girls were to dress up in their favorite princess costumes, and then come and do princess themed activities.  We attended in lieu of our regular troop meeting.
Abby and Emma borrowed dresses from one of their troop mates.  Brittany gave them each royal hairstyles before we left the house.  Abby wasn't entirely happy about this adventure, as she was a little tired, but she warmed up quickly.

Each troop was given a hand stamp, in a princess type theme.  There were 6 stations set up, and the different troops rotated around to each station.  Our first stop was the Royal Treasure Box.

This was basically musical chairs:  the girls handed around the treasure box, and whoever was holding it when the music stopped got to pick out a prize.  The girls running the station made sure that each girl got a prize.  Every girl in our troop picked out a "glass" slipper.  In this picture, Princess EC is handing the box to Princess C, while Princess Emma watches.

Princess Abby, waiting for the treaasure box.

Princess C, Princess EC, and Princess Emma
Here is Troop 31804's Royal Court, on their way to the next station:
Princess EC, Princess C, Princess Emma, Princess M, and Princess Abby
The next station was the Princess Snack station.  Each girl was given a juice pouch and a piece of bread.  They had various cookie cutters available, and each girl cut a shape out of her bread.  The most popular shape was a heart, but there was a star, a flower, and a butterfly also.  They got to spread their bread with strawberry jam, and the Royal Attendant sprinkled their bread with pink sugar.  Yummy!
Princess Emma

Princess Abby

Princess M and Princess C

At our next station, the girls made Princess Streamers, to be used for their Princess Dancing.  This was a very clever craft, and very easy for girls at this level to do.  They were each given a ponytail elastic and 6 ribbons.  They were taught how to fold the ribbons in half, thread the ribbon loop through the elastic, then pull the ribbon ends through the loop to tighten it up.
Princess M and Princess Abby, listening to instructions.

Princess Abby, Princess C, and Princess EC, making their bracelets.
After their streamers were done, the princesses put them on their wrists and did a twirly, spinny dance around the ballroom:
Princess Emma, in a fast paced princess dance.
The next station was the Royal Shrinky Dink station, where each girl was given a Shrinky Dink picture to color.  They had already cut out and hole punched the pictures, so each girl just had to color it as she chose, then give it to a Royal Attendant to be baked.  The finished Shrinky Dink was used at the next station.
Princess Emma, Princess C, Princess Abby, and Princess M.  Lady Rhiannon is helping in the background.  Princess EC was a little further down on the bench.
The next station was to make Royal jewelery.  The girls were each given a piece of lacing plastic, with their Shrinky Dink piece strung on the middle.  There were pans of pony beads of various colors and shapes along the table, and the girls were told to add beads to each side.  When they were done, the ends were knotted together.
Princess C and Princess M
Princess EC

Princess Emma

Princess Abby
The final station was at the Royal Photography booth.  All of the troop princesses gathered together to have their picture taken.  Then they decorated commemorative frames, which will have the photo mounted on it, and then they will be sent to us.
Princess M, Princess EC, Princess C,
Princess Abby, and Princess Emma.
This is a picture that I took, the official one isn't back yet.

Princess Emma

Princess Abby
This was a really, really well run event.  All of the older girls related very well to the younger girls, and there was plenty of help on hand to keep things running smoothly.  The girls also received a patch for their smocks, but for a change, the event overshadowed that fact!  And the REALLY good news??  They'll be invited back next year too!

Monday, May 30, 2011

Accordian Scrapbook Tutorial

A few days ago, I mentioned that the elementary school had hosted a craft/rummage sale as a school fundraiser, and that I made some small gift bags.  At the same time that I was making the gift bags, I was making small scrapbooks, which I also learned how to do at MOPS.  Unfortunately, I only got a few completed, and opted to leave them home until the next show, when I would be able to finish some more. 

I did take pictures of the process though, so I'm going to share them with you now.

Supplies needed:
2 Foam core squares, cut 6" by 6"
3 12" x 12" pieces of cardstock
Scrapbook paper:  2- 8" x 8" squares, 3- 5 1/2" x 5 1/2" squares, and twelve triangles, cut from 5" squares
Glue
Tape
Ruler
Butter knife
Ribbon

Step one:  Cover the foam core boards using the 8" squares of scrapbook paper.  I found that it helps to wrap them, as you would a gift.  Secure the edges with tape, if desired.


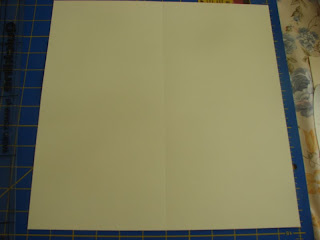
Step two:  Using a ruler and the back side of a butter knife, score the 12" cardstock from top to bottom and from edge to edge through the center.  Scoring will really help with folding crisply along the lines.  After both directions are scored, fold the card stock along one line.  Unfold and fold on the other line.  Unfold again.


Step three:  Turn the cardstock over and score from corner to corner, diagonally.  Repeat with other diagonal.  After both scores are made, fold along score lines, as you did in step two.  Make sure that the horizontal/vertical folds were made on one side of the paper, and the diagonal folds are made on the other side of the paper.


Repeat steps two and three on the remaining 12" x 12" papers.

Step four:  Lay the three pieces of cardstock side by side on the table from point to point, being sure the folds are all oriented the same way.  Take the middle page and turn it over.  Overlap the squares of the three papers as shown in the photo, and glue together.


Step five:  Begin gluing your scrapbook squares and triangles to the 3 assembled pieces of cardstock.  Mix and match papers, use coordinating papers, just generally have fun.  I have done a few theme albums for holidays.


Step six:  Carefully refold the papers, making sure they fold properly, and lay flat.


Step seven:  Glue one covered foam core board to the top and one to the bottom of the stack, making sure the pages are centered on the foam core squares.

It may be helpful to weight the album with a heavy book until the glue is dry.
Step eight:  Glue a ribbon to the front only of the book, paying attention to which direction the book opens in.  Make sure the ribbon is long enough to wrap around the back of the book, and tie on the right hand side.  If desired, you can glue pieces of paper over the ribbon, to use as both an anchor, and a way of labeling the scrapbook.  You can also add stickers, photos, or other embellishments if you wish.


After you complete the scrapbook, open it up and add your photos.  This makes a compact little album, which makes a great gift for just about anybody.  Have fun!