Friday, March 18, 2011

Happy St. Patrick's Day!

As most people who know me can tell you, I love desserts.  And I particularly love holiday desserts, especially those kind of, well, silly holidays.  (Not that I think saints' days are silly, per se.  It's just that, let's face it, here, for most people, St. Patrick's Day is just a day for corned beef and green beer.)  Anyway, I like days where I can get a little silly with desserts:  St. Pat's, April Fool's Day, Halloween.  So I was really loving making dessert with the girls this year.

Although I would have dearly loved to make the Irish Cream Mousse cake I saw a recipe for, my target audience is a little too young yet for such a thing, so our St. Pat's desserts usually center around rainbows.  Last year, we had really cool looking rainbow cupcakes (think tie dye).  This year, it was....Jello.  I saw the idea on the last page of a magazine, and thought it would be the perfect dessert.  Don't ask me which magazine, I don't know.  I don't remember, and more to the point, I couldn't find it when I went to make this yesterday.  But, it's Jello, how hard is it?

We used 6 large boxes of Jello in the following flavors:  cherry, orange, lemon, lime, berry blue, and grape.  Also, boiling water, a glass casserole dish, and non stick cooking spray.  We had six flavors, and 3 girls available to help, so each girl picked two flavors to make.  I'd like to say I took pictures, but the truth is, I mostly forgot.  Something about supervising young kids pouring boiling water....

Here is the first layer.  The colors in the picture aren't very true, but we started with grape.

I started to follow the pacakge directions as to amount of water, but soon figured out that at that rate, there was no way all six packs were going into that pan, so we switched to the Jigglers recipe starting with the blue layer.  By the way, see that smudge in the middle?  That's my fingerprint.  Yep, the Jello was set enough to pour the next layer.

Here's the blue.  I didn't take pictures of each layer, I promise.  The lighting in my kitchen was not great yesterday, so there wasn't really much definition between the colors.

Here is Katie, getting ready to mix her yellow, which was actually the fourth layer we added:


And here is a square of the finished product:
Isn't it pretty?  It didn't look like that in the pan at all, but once the light was shining through it, you could really see all the colors.  I served it with a "cloud" of whipped cream.

This was Maddie's first experience with Jello:

She actually stopped eating to pose for the camera.  Here is Emma and Katie:


And here is Abby:

Nope, not a ham in the whole Hansen clan!

One last shot of our pretty (and silly!) holiday dessert:


(And good news!  There's lots left over, for my secret bedtime snacks!)


Thursday, March 17, 2011

How a well supplied craft room kept me from losing Mom Points.

First of all, let me just say that another two weeks has slipped past me.  It's not that I haven't wanted to sit down and write to you, I just know that when I do, my whole day seems to evaporate somehow.  But, I have used my time wisely, and I'm going to do my best to update you!

This blog begins yesterday.  Actually, it began on March 10, which was the day before the kids got out of school for Spring Break.  Abby and Emma informed me that they needed to wear green to school the next day, in order to celebrate St. Patrick's Day in the classroom.  That was when we discovered that they didn't have much to choose from.  Abby has one shirt that is green.  Unfortunately, it has a rather large reindeer on the front of it.  Emma has.....nothing.  Absolutely nothing.  One of the drawbacks of refusing to wear any color other than pink.  We managed to find a shirt of Abby's that had enough green in it to pass, and she borrowed that.

Fast forward one week.  It's the day before St. Patrick's Day, and the bunch of us are scheduled to go to MOPS.  That means out.  And that means wearing green.  Now, a GOOD mom would've realized that this day was coming, and would have taken steps after the problem was discovered.  Apparently, in this instance, I am not such a mom.  Which led to yesterday's mad scramble.  And because of yesterday, I am able to maintain that a well supplied craft room is critical to the well being of my children.

I found some white t-shirts that had been purchased for another project, which we never got to.  After a 20 minute rummage through my craft room, I came up with a roll of Heat 'n Bond, and 5 different green fabrics.  I found a shamrock to trace, and copied it in 4 different sizes, then traced a number of shamrocks, of various sizes, on the back of the Heat 'n Bond.  Now, it was time to involve the girls.  I put each girl's first initial on the back of her shamrocks:  1 large, 2 medium, 3 small, and 4 tiny ones.  I then asked which fabric she wanted for each shamrock, and fused them to the the fabric.

I sat down and cut them out, which took quite a long time. 


Then called the girls in, one by one, to design their shirts.  Emma was first:
After she was satisfied with her design, I fused her pieces in place.  Here is her finished shirt:

It looks slighlty like a smiling face, doesn't it?

Next came Katie:

She was very precise about how she placed her pieces, and this is what she ended up with:


Now it was Abby's turn.  She really took it to heart when I told them to make sure that they were happy with how it looked, because once I ironed them, there was no changing.  Abby rearranged her pieces about a dozen times!


And this was her finished result:

And finally, I did one for Maddie:


Ordinarily, I would've sealed the edges with fabric paint right away, but I was afraid they wouldn't be dry in time to wear today, so I let that go.  I will be sealing them though, and hopefully, they will still fit next year!  They loved wearing the shirts...couldn't wait to get dressed today, actually, and I really think the fact that they "made" them themselves had a lot to do with it.

Happy Saint Patrick's Day!

Saturday, February 26, 2011

More Baking Fun!

I like snacking.  There, it's out!  I feel so much better now.  And while I've been done to eat an entire pan of brownies by myself (no, not in one sitting, thank you!), I do occasionally try to make healthy snacks.

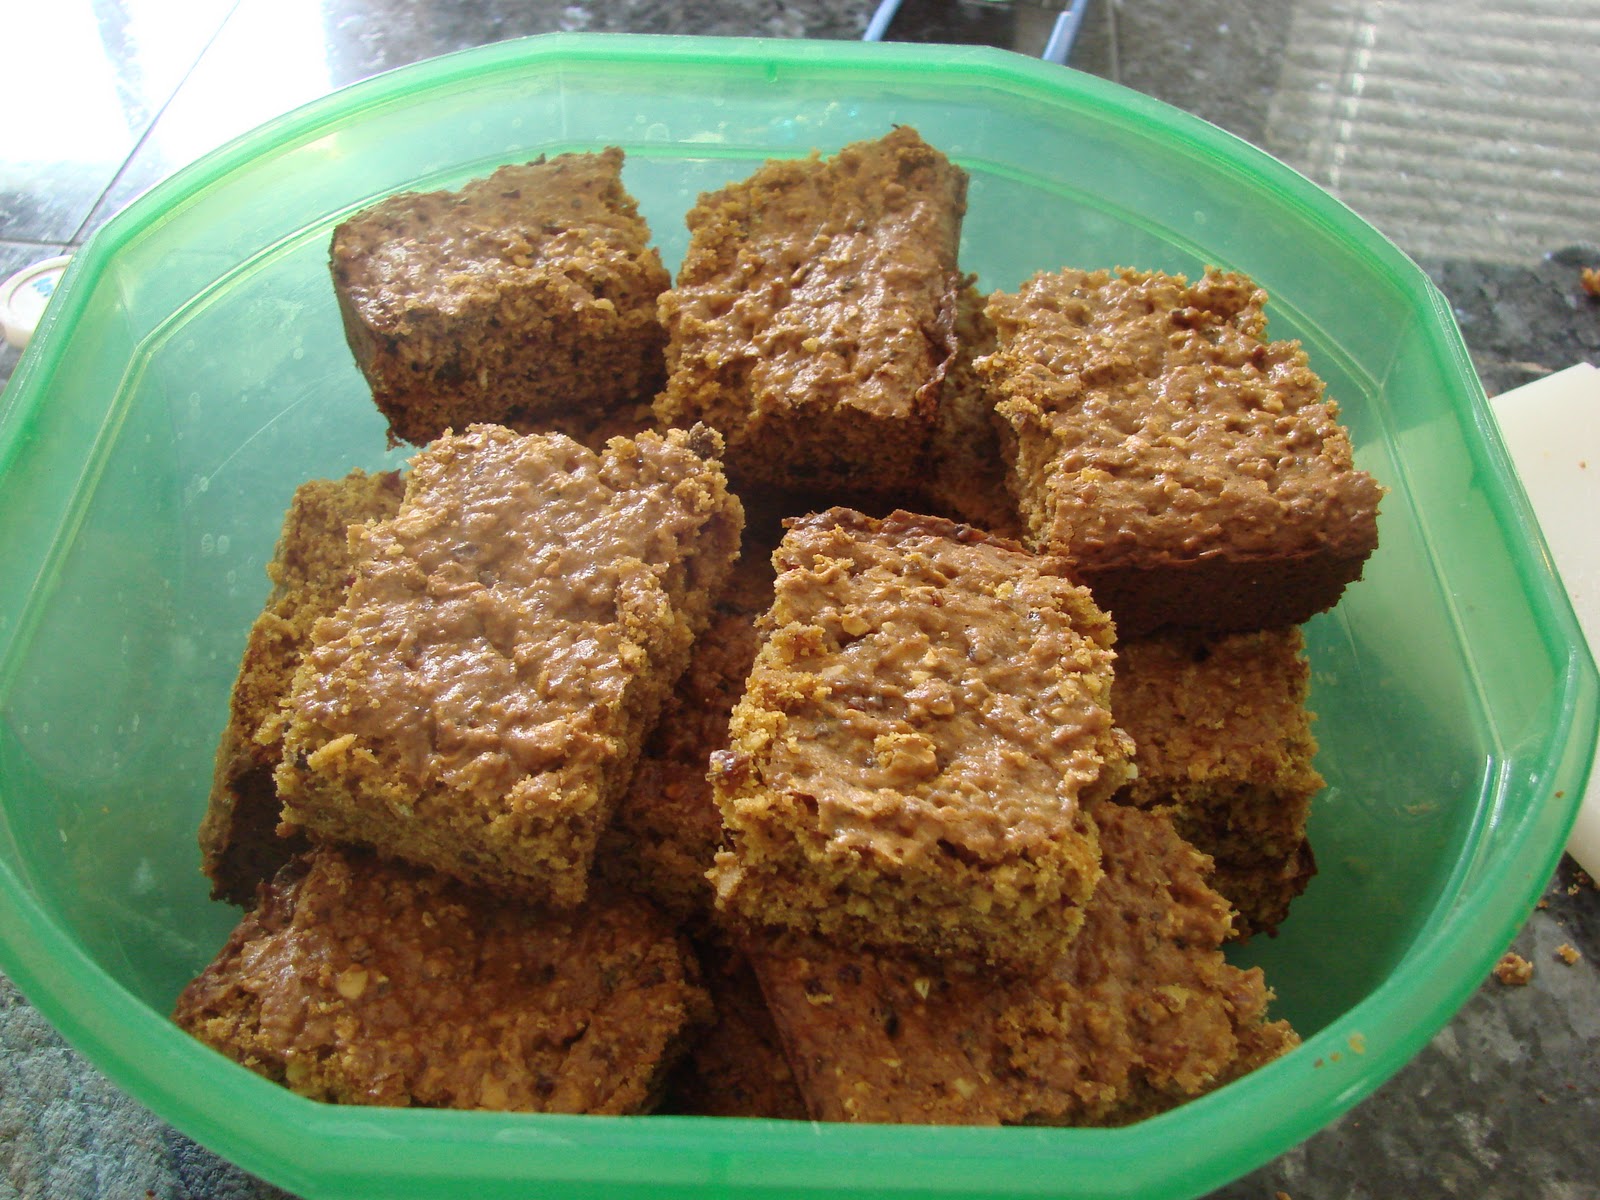
This past Sunday, I decided to make Michael's Energy Bars, by Michael Chiarello.  I've made these before, and I happened to have all the ingredients on hand, so now I'll share with you.

The dry ingredients.  The recipe calls for a half cup each of 3 different fruits, which can get expensive.  I used a packaged of mixed dried fruit, plus a half cup of dried cranberries.
Step one:  toast the oatmeal and almonds for 10 minutes.


Step two:  Place dried fruits and oatmeal/almond mixture in a food processor.  Pulse until coarsely chopped.

Step three:  Place egg, butter, molasses, and brown sugar in a mixing bowl.

Beat until light and fluffy.

Step four:  Combine remaining dry ingredients and vanilla extract in a small bowl.

Step five:  Add to mixing bowl and blend well.

Step six:  Pour in milk and blend well.

Step seven:  Add fruit/oatmeal/nut mixture and blend in.

Step eight:  Pour evenly into a well buttered pan and bake for 30 minutes.

Step nine:  Cool in pan.  Remove and cut into 18 pieces.  (The directions say into 18 1"x4" pieces, but mine are squares.)


Super yummy!  The kids even like them, yet you know there is healthy stuff hiding inside!  What could be better?  I've found this is a versatile recipe.  Use whatever kind of dried fruits you like.  Substitute nuts if you want.  Don't like a strong molasses taste?  Try using half molasses and half honey.  Or all honey, if you'd prefer.  I've got some golden table syrup in my pantry that I think I'll try next time.  I'm not sure how much the nutritional information will vary with these substitutions, though.  I do know that I've substituted frequently, and never met a batch I didn't like.  I hope you try them and like them too!

Friday, February 25, 2011

My Adventures in Crochet

My mom taught me the basic knit stitch about 15 years ago.  (Actually, she originally taught me some 30 or so years ago, but those lessons didn't stick!)  But that's all I knew.  For a dozen years, that's all I knew....the knit stitch.  There's only so much you can do when you don't know how to purl, but for the life of me, I couldn't understand what she was trying to teach me.  So, I decided that I would not be a knitter!  That simple, it's not like my life would be incomplete or anything.  Lots of people don't knit, and they are perfectly happy people.  And that worked for me.  For a dozen years or so, it worked just fine.

Two and a half years ago, that stopped working for me.  I wanted to knit, would not be happy if I were not a knitter.  I was pregnant with my last child, and was determined to knit for her, something beyond the basic garter stitch blanket I had started years earlier.  So, I bought a "Teach Yourself to Knit" book.  And guess what?  It worked!  I could knit, I could purl!  I could yarn over (YO), I could knit 2 together (K2tog)!  I wound up finishing 2 blankets, a nightgown, and an infant cap before Maddie was born.  I was knitting booties for her while we were in the hospital!  As you no doubt know by now, I love to knit.

Which is why, when the time came, I bought a "Teach Yourself to Crochet" book.  Seems simple enough, right?  It must be half as hard as knitting, I mean, you're using one stick instead of two!  Fewer pieces of equipment to keep track of...it has to be easier.  And every crocheter I've ever met says it IS easier.  Who am I to doubt them?  I'll tell you who I am.....a VERY frustrated would be crocheter, that's who!  I decided that particular book was the stupidest book I'd ever read, so I bought a different book.  The second book wasn't any better, nor were the third book, various pattern books, and scads of YouTube videos.  Bottom line:  The only two things knitting and crochet have in common is that they both use yarn, and they both start with a slip knot.  I. Could. Not. Learn. To. Crochet.  And it made me mad.  I wanted to, and there shouldn't be any reason why I couldn't. 

So, when I got word that my church was starting a group to sew, knit, and crochet chemo caps to donate to the local hospital, I jumped on it.  I could certainly knit hats, and I would have the opportunity to learn, elbow to elbow, with crocheters.  I went to the first meeting, and was told that it was easy.  I was told that it was twice as fast.  I was told that anyone could learn.  And I was given a pattern.  Now granted, all I had was a printed pattern, and that hadn't worked for me before, but as soon as I got home, I got out some yarn and a hook and got started.

Here's my very first attempt:

I quickly realized that I had made a mistake, and abandoned the project.  (By the way, Abby spotted it, and decided it would make a good headband!)

Not deterred, I started again, later that night.  This time, I was sure I had followed the directions perfectly, and was happily "hooking" away.  About 3 rows in, I realized that....

...when I joined the ring, I had twisted the stitches around.  Not useful in a hat.  So, I decided that maybe I needed to learn on something else.  I got out a few pattern books, and poked around in them.  I found a pattern for a bathroom caddy.  Something along the lines of a soft cup for holding cotton swabs and the like.  I found some yarn and began.  I was really moving along, and stopped to count the stitches, to compare my work to the pattern.

The cup is curving, like it's supposed to, and I'm sure this can be completed, but my stitch count is off.  So, that project was also shoved into a basket.  Sigh. 

I know!  Granny Squares!!!  Perfect for a beginner.  Everyone does Granny Squares.  I found some complementary colors of yarn out, and made:

...a coaster.  Only who needs ONE granny square coaster?  It looked like it was supposed to, but it is 100% cotton, which is not really useful in a blanket, plus I'd have to make about 500 more of them.  But hey, it's progress.  If I could do that, I should be able to do a basic washcloth, which led me to this:

Again, the stitch count is off somewhere, and it is not lying flat.  After this particular failure, I was quite vocal in my opinion that anyone that thinks crocheting is easier than knitting has CLEARLY never tried knitting!  My "abandoned project" basket is getting fuller!

I decided to try one more washcloth pattern before completely giving up.  This one was a little more challenging, as you crochet one triangle first, then the 2nd triangle, and so on, until completing the square.  Three triangles into this, I was quite pleased with myself.  I would have a very pretty washcloth when I was finished, and a much needed confidence boost in my ability to learn this craft.  Here is the resulting washcloth:


In the picture, this actually doesn't look too bad, if you ignore the poor color quality.  (We have been challenged in the natural light department here lately...very cloudy!)  But, if you look carefully at the upper right corner, you can see that my last triangle isn't quite right.  Yep, you guessed it, my stitch count is off, and I don't have a true square.  However, this is the closest I've come to success yet!  (Maybe I really CAN crochet!  Maybe the problem is that I can't COUNT!)

Then, I found a pattern for a blanket composed of granny triangles.  It uses only 2 colors, and would be slightly different from the squares, yet similar enough that I thought I could manage it.  I've done 3 triangles so far:

I really like this.  I'm not sure I'll ever finish 150 more triangles, but I can do a few at a time, just to practice.  And in the end, I might have something useful to show for it.  I was ready to concede that I might, eventually, be able to say that I can crochet.  Yay!  I was feeling quite good about this.  Not proficient, certainly not good enough yet to call myself a crocheter, but I had hope. 

So imagine my surprise when my husband came home from his mom's house with an old crocheted blanket that needed some repair work, desparately.  My husband had seen this hole in the blanket, decided the pattern looked like the "coaster" that I had successfully made, and decided to bring it home to see if I could fix it.  Sometimes his faith in me is a little stronger than my faith in myself.  Which is a good thing, definitely.  But sometimes,....it's not.  Sigh.
The first thing I did was use locking stitch markers to hold the loops for the green clusters, while I studied the pattern, to make sure I understood what had to be done.  I began, using the original, unraveled yarn.  While it looked almost identical to the intact part, I didn't have quite enough yarn to finish.  So, I undid the work, went down a hook size, and tried again.  Still not quite enough yarn, but close.  I did have to use some additional yarn to fasten off the row, but I'm very happy with how it came out!

This picture was taken the next morning, so you can better see the actual colors.  The row I fixed is the light blue row at the top of the square.  In the upper left hand corner, you can just see the little bit of blue yarn I had to add.  I hope my mother in law thinks it looks as good as I do!

While looking at this blanket, I found some other spots that need some attention:

This is the worst spot, and all it will take is a little bit of re-seaming.  As it happens, I have some brown yarn that is nearly identical in shade, so I will be fixing that bit directly after dinner. 

There may be hope for me yet!  I may be able to learn this craft yet!!  But I still might not be up to making hats this way.....

Thursday, February 24, 2011

Pretzel Day

By now, you must know that everything I do is done on a large scale, especially when it comes to cooking.  For one thing, making a recipe for an average sized family just isn't enough for a family of 8, even when 4 of those are not full sized people.  For another thing, I firmly believe that making a double batch of a labor intensive recipe does NOT double the time you spend on it.  At best, it is only a few extra minutes of assembly time, which saves buckets of time down the road, if you freeze half for later.  I'm a big fan of freezing things for later!
So today I'm going to show you a recent Pretzel Day our family had. Ultimately, I made 2 double batches of dough, and used one batch for pretzels, and one batch for pretzel dogs.  Yummy!  Ingredietns listed below are for a single batch, which will yield 12 pretzels or 12 pretzel dogs.

Ingredients:
1 package active dry yeast
1 cup warm water (about 110 degrees)
2 1/2 to 3 cups all purpose flour
2 tablespoons salad oil
1 tablespoon sugar
6 tablespoons baking soda in 6 cups of water
coarse salt (for pretzels)
hot dogs (for pretzel dogs)

To make pretzels:

In a bowl, dissolve yeast in water.  Add 1 1/2 cups of flour, the oil, and the sugar.  Beat for about 3 minutes to make a smooth batter.

Gradually stir in enough of the remaining flour (about 1 cup) to form a soft dough.  Turn out onto a floured board and knead until smooth and satiny,(about 5 minutes), adding flour as needed to prevent sticking.  Place dough in a greased bowl; turn over to grease top.  Cover and let rise in a warm place until doubled (about 1 hour).

Punch dough down, turn out onto floured board, and divide into 12 pieces. 


Shape each into a smooth ball by gently kneading.  Then roll each into a smooth rope, about 18 inches long, and twist into a pretzel shape.


Place slightly apart on a greased baking sheet (at least 12 x 15 inches), turning loose ends underneath.  Let rise, uncovered, until puffy (about 25 minutes).

Meanwhile, in a 3-quart stainless steel or enameled pan, bring baking soda/water mixture to boiling; adjust heat to keep water boiling gently.  With a slotted spatula, lower 1 pretzel at a time into the pan.  Let simmer for 10 seconds on each side, then lift from water, drain briefly, and return to baking sheet.


Let dry briefly, then sprinkle with coarse salt, and let stand, uncovered, until all have been simmered.


Bake in a preheated 425 degree oven for 12 to 15 minutes.  Transfer to racks.  Serve warm, or let cool completely, wrap airtight and freeze.  (I freeze them completely, then transfer them to ziptop bags.)  I reheat them in a microwave.


To make pretzel dogs:

Follow the above directions through rolling out an 18 inch long rope.  Then, wrap around a hotdog, keeping wraps close together.  Roll the wrapped dog with your hand on the board a few times to tighten up.


Eliminate the rising time for the pretzels, but simmer the hotdogs as directed above.  Place the hotdogs on a baking sheet.  I line my baking sheets with parchment paper, to eliminate sticking.  I do not sprinkle them with salt.


Bake as above, but for 8 to 10 minutes.  I find that they are usually golden brown by now.  We really like these with mustard.  You could, for a variation, top the pretzel dogs with shredded cheese before baking them.  I haven't tried this yet, but plan on it some day.


You can freeze these as you do the pretzels, and then have a quick and easy lunch for the kids to grab!

(The above recipe for pretzels came from the Sunset Breads cookbook, printed in 1991.  I devised the use of the dough for pretzel dogs after seeing how much the local pretzel shop wanted for one!)

Wednesday, February 23, 2011

January Finished Projects

While I don't typically make New Year's Resolutions, I did decide that one of my goals for 2011 is to finish up some of the Unfinished Objects (UFOs) that I have around my house.  And to use up some of the yarn that I have stashed in every available spot around my house and in my garage.  (I promise you, you'd be horrified if I were to disclose the size of either of those 2 categories here.)

So, in order to track my progress on that goal, I've decided to take pictures of every finished project for the year.  Hopefully, I will see some sense of productivity by year's end.  I won't be able to show you every picture every month, as a lot of them will be presents, but I will show them to you by year's end.  And, in order to stay honest, I'll let you know if the yarn used was a stash yarn, or a new purchase.  Oh, and I guess I'd better designate which projects were former UFOs, and which were new.

First up, a potholder.  Kind of mundane, I know, but I had purchased a book of patterns for dishcloths and potholders, and this was in there.  I wanted to try out some new techniques, my pot holders all look really awful, and I had the yarn in the garage, so I was totally able to justify this new project:
Next was a new hat for Maddie.  I had put a new knit hat in Don's Christmas stocking, and Maddie adopted it.  I really wanted Don to have his new hat back, so I had to make a new one for her, didn't I?  Plus, I tried a new technique, and I had both yarns in my stash.  (See how this justification stuff works???)  So here was new project #2:
P.S.:  She won't wear it.  She still has Don's hat!
Project #3 was for my grandmother, who fell and broke her finger.  I wanted to do something for her, kind of an "I'm thinking of you/get well soon" gift.  So, this was a new project.  And while I have lots of this type of yarn in my stash, I had none in her favorite color.  The picture doesn't show it very well, but this is a very soft purple color, knit in Lion Brand Homespun yarn.  It was a really quick knit, and I wrapped it up with her favorite teabags, cookies, and candy, and shipped it off.  So, while it didn't qualify for ANY of my goal criteria, I really, really enjoyed this one:

The next project was legwarmers for Katie.  That girl wears dresses or skirts almost every day, regardless of the weather!  It makes me cold just looking at her sometimes, so I made her some legwarmers, as a kind of compromise.  I actually knitted these on her birthday, and finished them the same day I started them, so they didn't stay on the needles for very long.  While they were a new project, I had the yarn in my stash, so that was a plus.  Here is Katie, modeling them:


That project led to projects 5 & 6.  Yep, that's right, they wanted legwarmers too.  So yes, 2 more new projects.  But, I used stash yarn for both, and had both pair done in 2 days.  Katie's are in the pictures too, but Emma's are pink, and Abby's are purple.  I was going to make a pair for Maddie also, but we discovered that her pair from last year still fits.


Project #7 probably shouldn't really count, but I'm going to.  I made this dishcloth last year, and it's been sitting around for at least the last 6 months.  Finished.  Except for one thing:  weaving in all the yarn ends.  And there were about 8 of them.  I hate weaving in yarn ends.  That is why this at around.  But, when I came across it, I decided that the time had come, and in approximately 15 minutes, I finally able to add a check mark to my list of UFOs. (I'm not proud, I'll take it!)  (Again, a new technique!  I found the pattern for this dishcloth online, and sadly, cannot find it now.  When I do, I will publish the link.)


I'm not going to show you project #8, because it may or may not be a present for someone.  I will say that I used yarn from my stash, but that it was a new project.  So it counts on one list, but not the other.

Project #9 will be a gift, and it was a UFO.  It was a fun project, and I learned some new techniques, so I will be making more of that one!

Projects #10 and #11 were UFOs, started before Christmas, and may or may not be gifts.  Also projects that I learned some new techniques in!

Okay, so final count:

1 new project with purchased yarn,
6 new projects with stash yarn, and
4 UFOs completed

All in all, not a bad January!